Deploy Spring Boot App to Heroku using Github Actions

Introduction
Github Actions is a new feature from Github which lets you create pipelines to automate your workflows such as deployments, tests, PRs etc. In this tutorial, we will learn how to deploy a Spring Boot app to Heroku using Github Actions.
Heroku is a PaaS (Platform as a Service), platform unlike AWS (which can be IaaS aka Infrastructure as a service), that lets you deploy apps very easily. And most importantly for students or developers or people trying to have fun, heroku has a free tier where you can deploy apps without paying any money. There are some limitations with Heroku’s free tier, but those are not really deal breakers for developers who are testing things out and are learning. One important limitation to keep in mind is that if your heroku app (they call it dynos) stays idle for 30 minutes, it shuts down and the next request which will restart/wake up your application might take 2-3 minutes to load. However this is not a big deal breaker as this happens only on the first request and subsequent request-responses are quite fast.
With that said, lets get started.
Steps to deploy
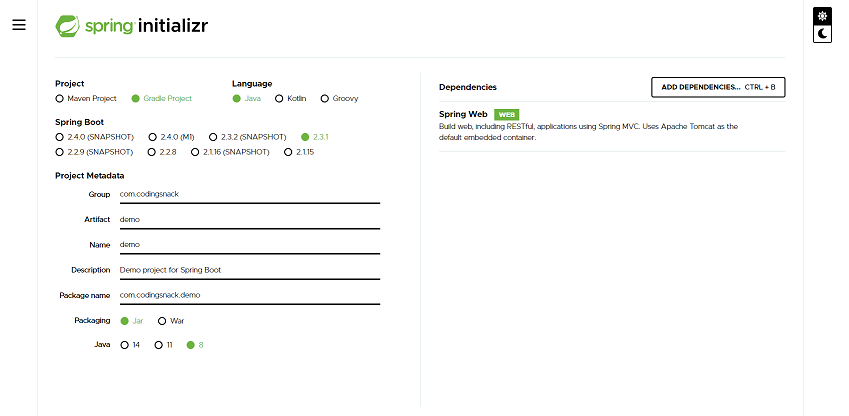
Step 1: Create a new Spring boot app using your IDE or using Spring Initializr. You can use the defaults as shown in the image below.

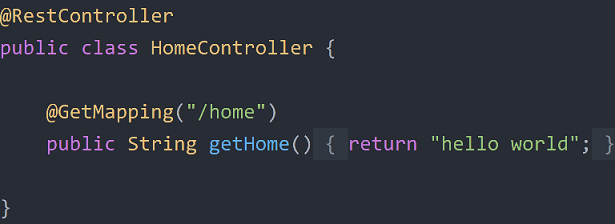
Step 2: Let’s add a small controller to return some basic data as shown below

Step 3: Now let’s create a new github project and associate that git remote to the above created spring boot app
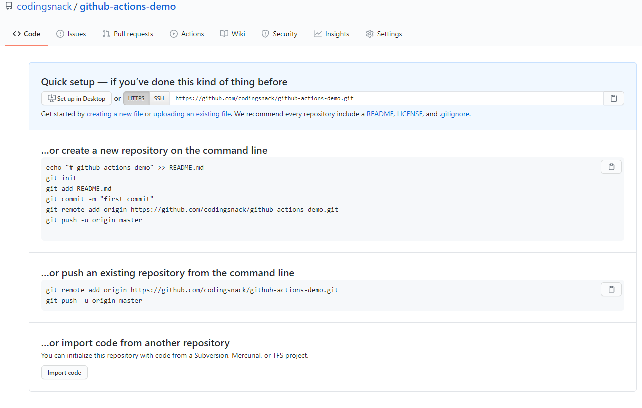
When you create a new repo on github, it will look something like this:

Copy the url shown and open terminal (on windows you can use Git Bash) and cd into the directory for your spring boot app. Now run these commands one after another
git init
git remote add origin https://github.com/codingsnack/github-actions-demo.git
git add .
git push origin master
Now you should notice that your github repository will have Spring Boot App’s code.
Step 4: Let’s create a new account on heroku and grab the api token.
- Go to Heroku and create a new account.
- Now go to your account settings (click top right menu which has your avatar).
- Now scroll to the bottom and copy the API Key and save it in notepad or any other editor of your choice (we will need it in later steps).
Step 5: Let’s add a github actions workflow.
Now in your Spring Boot app, create a new file under .github/workflows folder. Let’s call this gradle.yml. Copy the below content as it is into this file
name: Java CI
on: [push]
jobs:
  build:
    runs-on: ubuntu-latest
    steps:
      - uses: actions/checkout@v2
      - name: Set up JDK 1.8
        uses: actions/setup-java@v1
        with:
          java-version: 1.8
      - name: Deploy to heroku using an action
        uses: akhileshns/heroku-deploy@v3.2.6
        with:
          heroku_api_key: ${{secrets.HEROKU_API_TOKEN}}
          heroku_app_name: "github-actions-heroku-demo" #Must be unique in Heroku
          heroku_email: "codingsnack@gmail.com"
We are using AkhileshNS/heroku-deploy plugin (also called as a github action) to deploy our app to heroku. But before that we checkout our code using actions/checkout@v2 and then setup jdk 1.8.
You also need to provide these three things
heroku_api_key: We are using a environment variable (more about this below).heroku_app_name: This name is very important and must be unique in Heroku. Heroku will use this name to create an endpoint for your spring boot app.heroku_email: Your email with which you login to heroku.
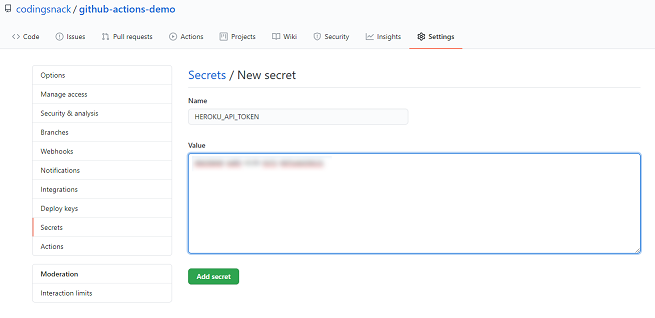
Step 6: Now add heroku’s api token as a secret in your github repo.
- Go to your github repo and add click Settings
- Once on Settings, click on Secrets
- Now click New Secret and in name field type
HEROKU_API_TOKENand in the value field, paste the heroku api token which you copied in previous step as shown below.

Step 7: Now let’s simply commit and push the app and watch the magic.
Now run these commands one after another.
git add .
git commit -m "Added github action"
git push origin master
Now go to your repo and you can see that github action is running. Once it runs, it might look something like this:

Step 8: Testing your Spring Boot endpoint
Now you can go to your heroku dashboard and you will notice that your app has been created. You can open it and click “Open App” which will open a page that will throw “Whitelabel Error Page”, which means that your Spring Boot App deployment has been successful (Whitelabel Error Page is the default error page that Spring Boot sends). Now use the same url and add /home to it and you will see that it returns "hello world". In our case, that endpoint would be
https://github-actions-heroku-demo.herokuapp.com/home
Now if you change anything (like adding new controller etc) and perform a commit and push, github actions will automatically trigger the deployment and after few minutes you should be able to see the changes in the newly created heroku deployment.
Conclusion
Now that you’ve seen how easy it is to use github actions to automate your deployment, there is no reason why you should not use this for your projects. Hope you’ve learnt something from this article. Have fun.